No-Knead Bread
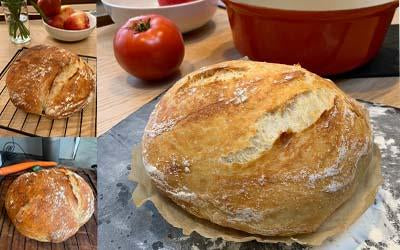

After I posted these bread photos, a bunch of my friends commented or asked me for this recipe. Since it's a super-easy, no-experience-necessary kind of recipe, I thought why not share with you, too. I don't know about you, but cooking and eating is a favorite pastime of mine. During these bizarre days, I find it's just the salve I need to put my head on straight. I have no idea who the brilliant mind is who came up with #fattenthecurve, but this phrase makes me smile with every bite.
Back to the bread... this is a long-running NY TIMES COOKING classic called No-Knead Bread. I've included the recipe below and the link so you can save it to your own recipe box. NOTE: WHEREVER I HAVE CHANGED THE ORIGINAL RECIPE WILL BE DENOTED IN THESE LOUD ALL CAPS. And since I'm not a food blogger, there's no step by step photos. But I do have these homemade silly videos. Apologies in advance.
WHAT YOU NEED
1 BIG BOWL
1 SHEET OF UNBLEACHED PARCHMENT PAPER
1 WORK SURFACE OR CUTTING BOARD
1 3-4 QT BIG OVEN SAFE POT OR DUTCH OVEN (CAST IRON, ENAMEL). THE RECIPE SAYS YOU NEED A 7 QT, NAH... SMALL IS FINE.
INGREDIENTS
- 3 cups [430 g] all-purpose or bread flour, more for dusting
- 1 5/8 [345g] of tepid water
- ¼ teaspoon instant yeast
- 1 ¼ teaspoons [8 g] salt [THIS IS TOO LITTLE, BUT A TBS IS TOO MUCH, PLAY WITH IT.]
- Cornmeal or wheat bran as needed [I JUST USED FLOUR]
PREPARATION
- In a large bowl combine flour, yeast and salt. Add 1 5/8 cups [345G OF TEPID] water, and stir until blended; dough will be shaggy and sticky. Cover bowl with NON-plastic wrap (USE A DISH CLOTH OR SILICONE LID OR HALO DISH COVER). Let dough rest at least 12 hours, preferably about 18 [I DID 18 HOURS ON TOP OF OUR FRIDGE], at warm room temperature, about 70 degrees.
- Dough is ready when its surface is dotted with bubbles. Lightly flour a work surface and place dough on it; sprinkle it with a little more flour and fold it over on itself once or twice. Cover loosely with plastic wrap and let rest about 15 minutes.
- Using just enough flour to keep dough from sticking to work surface or to your fingers, gently and quickly shape dough into a ball. Generously coat a cotton towel (not terry cloth) with flour, wheat bran or cornmeal; put dough seam side down on towel and dust with more flour, bran or cornmeal. Cover with another cotton towel and let rise for about 2 hours. [WHY WOULD YOU MUCK UP A TOWEL? I PUT THE DOUGH ON A SHEET OF PARCHMENT PAPER PLACED IN THE BOTTOM OF THE DIRTY BOWL IT SAT IN FOR 18 HOURS] When it is ready, dough will be more than double in size and will not readily spring back when poked with a finger.
- At least a half-hour before dough is ready, heat oven to 450 degrees. Put a 6- to 8-quart [3-4-QUART IS FINE] heavy covered pot (cast iron, enamel, Pyrex or ceramic) in oven as it heats. When dough is ready, carefully remove pot from oven. Slide your hand under towel and turn dough over into pot, seam side up; it may look like a mess, but that is O.K. [HERE I JUST CUT THE PARCHMENT AROUND THE DOUGH, LEAVING ABOUT AN INCH OR TWO SHOWING. THEN I PICKED THE DOUGH UP BY THE PAPER AND PLACED INTO HOT POT, LEAVING ME ONLY THE BIG BOWL TO CLEAN]. Shake pan once or twice if dough is unevenly distributed; it will straighten out as it bakes. Cover with lid and bake 30 minutes, then remove lid and bake another 15 to 30 minutes, until loaf is beautifully browned. [I ERRED ON THE SIDE OF LIGHTER CRUST BECAUSE I WAS WORRIED ABOUT THE BOTTOM. TURNED OUT PERFECT. KEEP THE LIGHT ON IN YOUR OVEN, JUST WATCH IT FOR 10 MINUTES.] Cool on a rack.
More notes:
Flour: I just used plain old all purpose. Tomorrow, I'm going to replace 1/3 of the flour with white whole wheat. See how it goes and then the next day maybe add more. UPDATE: I RECENTLY SWITCHED TO BREAD FLOUR AND WHILE IT'S NOT A MAKE OR BREAK DIFFERENCE, I REALLY LIKE IT.
Other ingredients: Someone suggested in the notes that you could cut up a bunch of fresh jalapeños during the initial mix, and add a cup plus a half of cheddar after 18 hours when you fold it. I will do this at some point for sure. UPDATE: I'VE BEEN DOING THIS AND LOVE IT! SO FAR... YOU CAN'T PUT ENOUGH CHEESE IN IT, AND BETTER WITH FRESH JALAPENOS. I TRIED IT WITH JALAPENO CHEESE AND IT WASN'T THE SAME. WE'RE GOING TO TRY OTHER ADDS SOON TOO... ROASTED GARLIC, OLIVES, WHATEVER MAKES US SMILE.
LAST UPDATE!
I've been halving and quartering these loaves before I bake them so I have several small boules instead of one big one. Easier to store, and the 1/4 rounds are perfect when it's just two for dinner. THE KEY here is to reduce the baking time... if you halve it, 20 minutes. If you quarter it, 15 minutes.
Sending positivity your way, be well, stay healthy. We'll get through this.
~Jennifer
Send me photos of your bread!
Leave a comment